How to add accounts to the Dolphin{anty} browser antidetect profile using FB as an example
Blog » How to add accounts to the Dolphin{anty} browser antidetect profile using FB as an example
Although Dolphin{anty} is easy to use, new users of the browser sometimes face problems when setting up the browser and adding accounts. In this article, we’ll show you how to add accounts to Dolphin{anty} and help you avoid the mistakes that new users sometimes encounter.
How to add a purchased account to Dolphin{anty} ✅
For this review, we bought a FB account with cookies.
To add an account, go to your browser and click “Create a profile”.

Enter basic information about the profile:
- Name;
- Profile Type. If the type you need is not on the list, just click None. This choice has no effect on the quality of the digital fingerprint;
- Add statuses and tags, if you require them. If you haven’t decided yet, you can add them later.
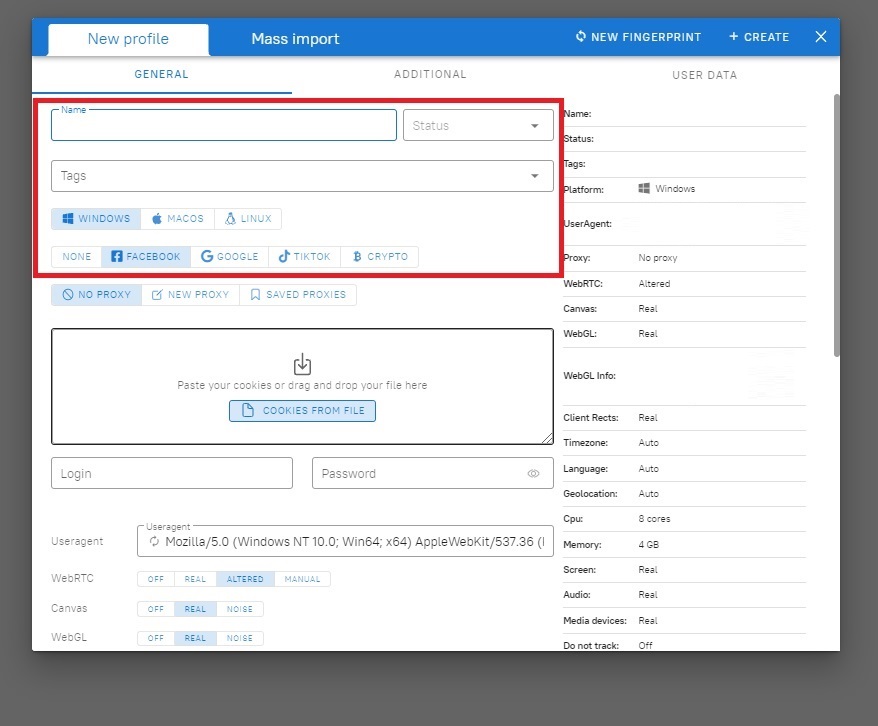
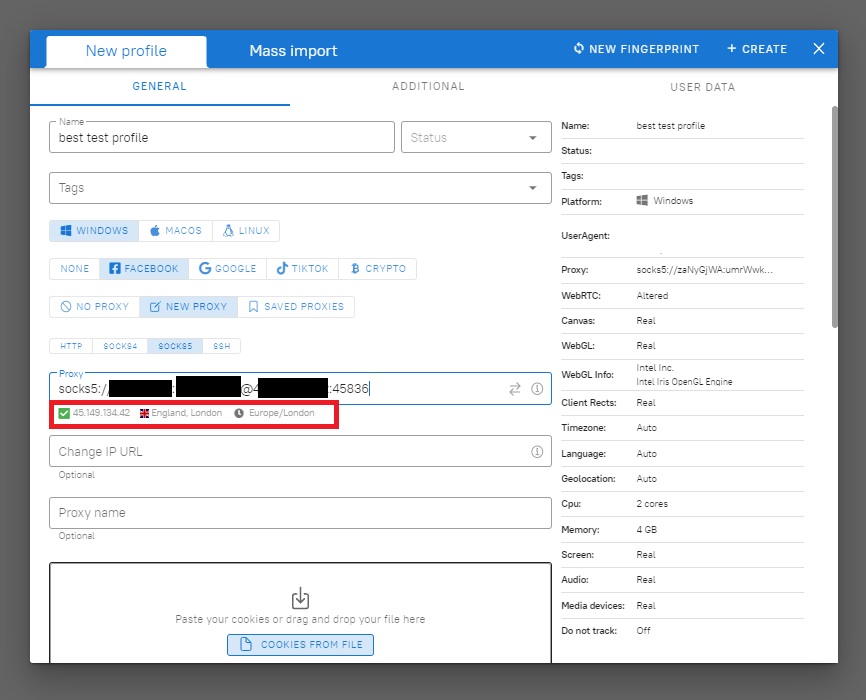
Then click “New Proxy” and enter the details of the proxies you purchased. Dolphin{anty} has several proxy entry formats. The format you need will depend on the type of proxies you bought and the amount of data from the seller.
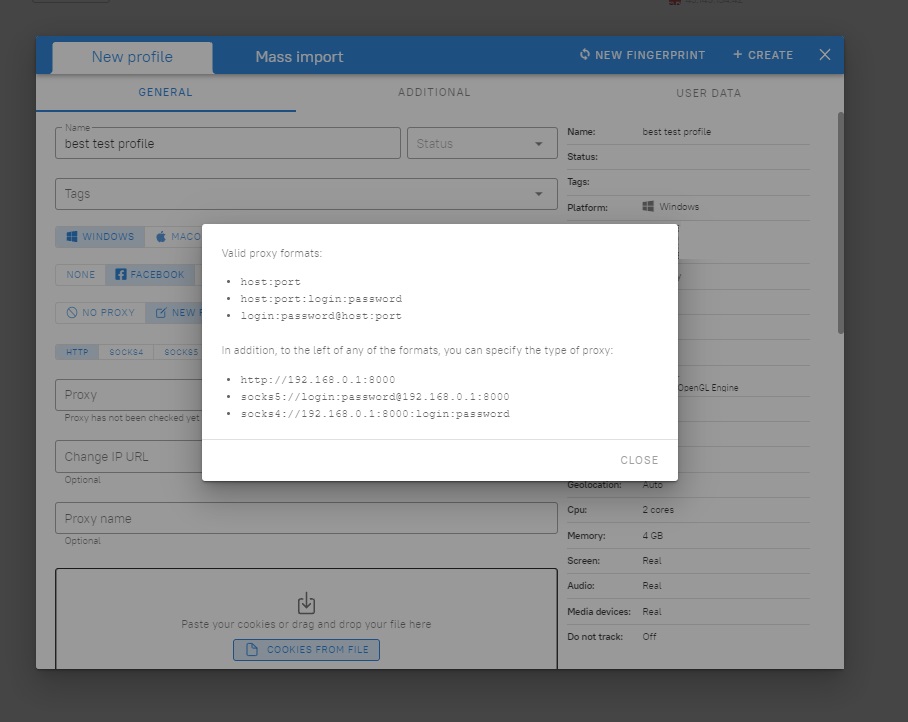
We used the format: socks5://login:password@192.168.0.1:8000
After adding the proxy, it is important to check that there is a connection to the proxy server.
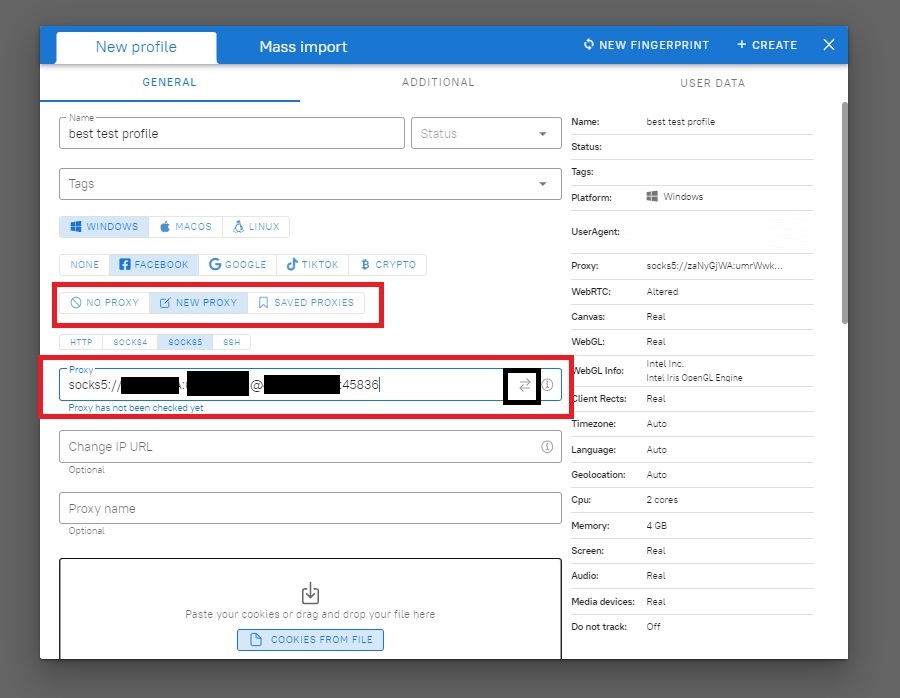
If all is well, the browser will display the IP address and country of the IP.
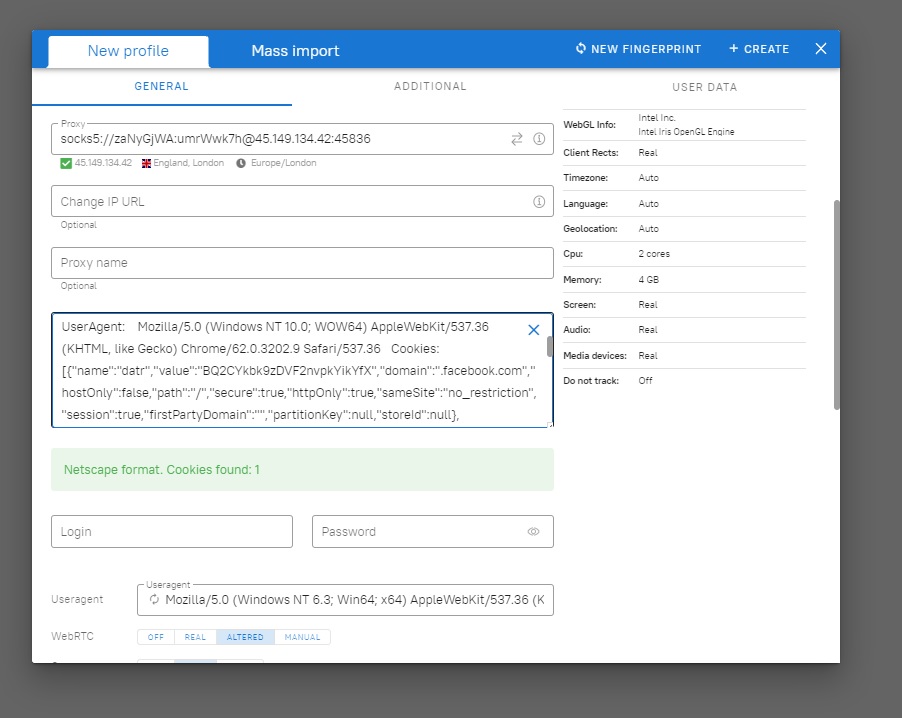
Next, if you bought an account with cookies, you need to add the file that the account seller gave you. After downloading the file, the browser will show you if the file has cookies in it.
If there is no cookie in the file, you will see this message:
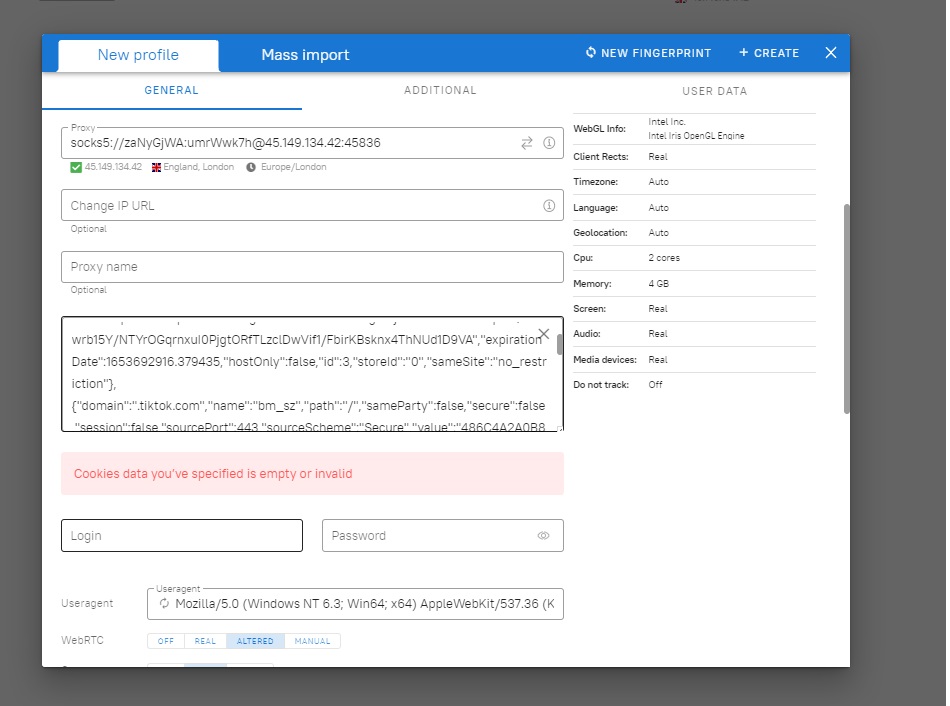
In this case, you need to contact the seller and clarify the reason the cookies are missing. As a rule, verified sellers with a reputation will help find the cause of the problem or offer to replace the account.
If you bought an account without cookies, you can enter your username and password in your browser. You can also enter your data on the website by using Smart Paste — an imitation of manual entry.
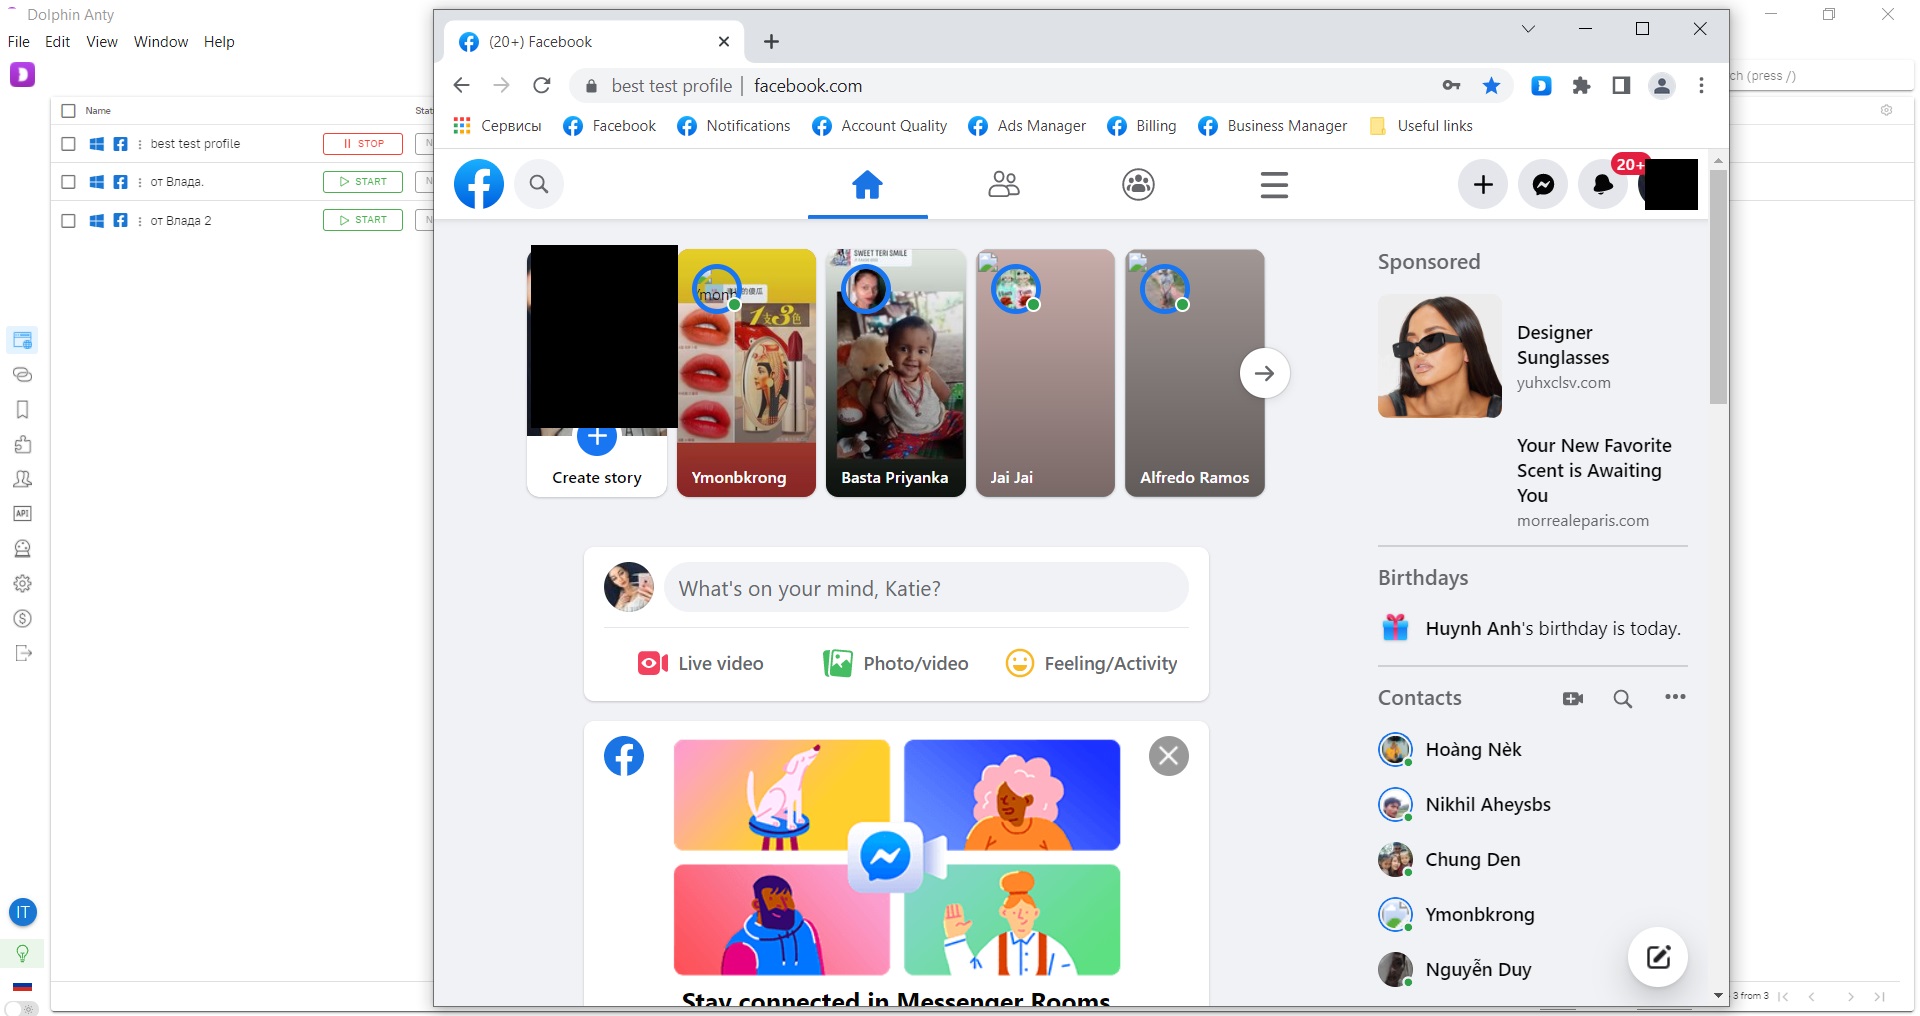
Once all the data has been added, click save. To launch the profile, click Start.

If everything is done correctly the account will open.
How to mass import accounts into Dolphin{anty} 🙌🏼
Previously, users could only add accounts through the anti-detect browser. There were two ways to do this:
- Through account creation. To do that, you had to click on “create profile” — “mass import” and then add account files.
- Through API.
Now there is an even faster way to do it: Dolphin{parser}. With this tool, you can import dozens of accounts you’ve bought in the stores in just a few minutes.
What can cause problems when adding accounts in Dolphin{anty} ⛔️
Sometimes users encounter problems when adding accounts because they think that the anti-detect does not work. In reality, the error can be in the user’s actions.
Below, we have collected the main errors related to accounts and proxies.
Problem Cause: Accounts
❗️Buy accounts from trusted sellers
It’s important to choose sellers with a reputation and quality customer service. The truth is, even the most trusted sellers may sometimes have issue accounts. However, if you contact a reliable and trustworthy merchant, they will be able to advise you on settings and, if the problem persists, they will replace the account without additional charge.
❗️Accounts don’t fit the user’s tasks
Sometimes it happens that users don’t read account descriptions carefully. As a result, it turns out, for example, that the user wanted an account with cookies, but bought an automatically registered one that only had the username and password on file. As a result, the anti-detect browser doesn’t see the cookies in the file, because they are not there, and the user thinks that the problem is in the anti-detect.
When buying accounts, pay attention to:
- The GEO in which the account was created. Separately, some sellers sometimes write, from which proxy (GEO) has already been logged into the account;
- Whether the account has been used before. For example, an account may have been sold right after it was created and without any activity, it may have been warmed up manually, or it may have been created years ago and not used for a long time;
- What information is provided to sign in. Typically, if it is a fresh new account, it may have no activity yet, so you’ll need to sign in by username and password. If the account has a history, it may have cookies, so you may sign in automatically.
- Whether the account has run ads before;
- Seller’s warranties. Pay attention to whether the seller gives guarantees on their accounts. Since not all sellers behave in good faith, it is better to buy accounts in small batches at first to make sure of the quality of the profiles.
The cause of the problem: proxies
For proxies to work, it’s important that
☝️Proxies must match the geo of your account
All countries in the world are divided into three categories according to the purchasing power of the population.
Tier-1 — the countries with the most solvent population. These include countries in Western Europe, USA, Canada, Australia, and others.
Tier-2 — countries with an average purchasing power of the population. For example, Russia, China, Malta, Morocco, Mexico, Brazil, Belarus, and others.
Tier-3 — countries with low ability to pay. For example, Albania, Armenia, Georgia, India, Macedonia, Turkmenistan, Tajikistan, and others.
Sometimes it happens that users try to save money, so they use cheaper proxies of the Tier-3 countries for an expensive Tier-1 account.
As a result, either the user cannot log in to the account at all, or the account goes for verification.
To avoid such problems, it is important to use proxies that match the geo of the account, or to use IPs of the countries in which the account has already been used.
☝️The correct port for the proxy
Sometimes it happens that when you buy a proxy, there is some standard port specified in the document which may not work.
You can solve the problem by asking the proxy server support what port is better to use for a particular proxy.
For example, in our case, when we purchased British socks5 proxies, port 51674 was specified, which didn’t work. The support said that we can use port 45836 for these proxies.
☝️For some GEO to use proxies
Additionally, to connect from some countries, it is necessary to use a proxy.
☝️Enter the data of the proxy according to the formats of the anti-detect browser
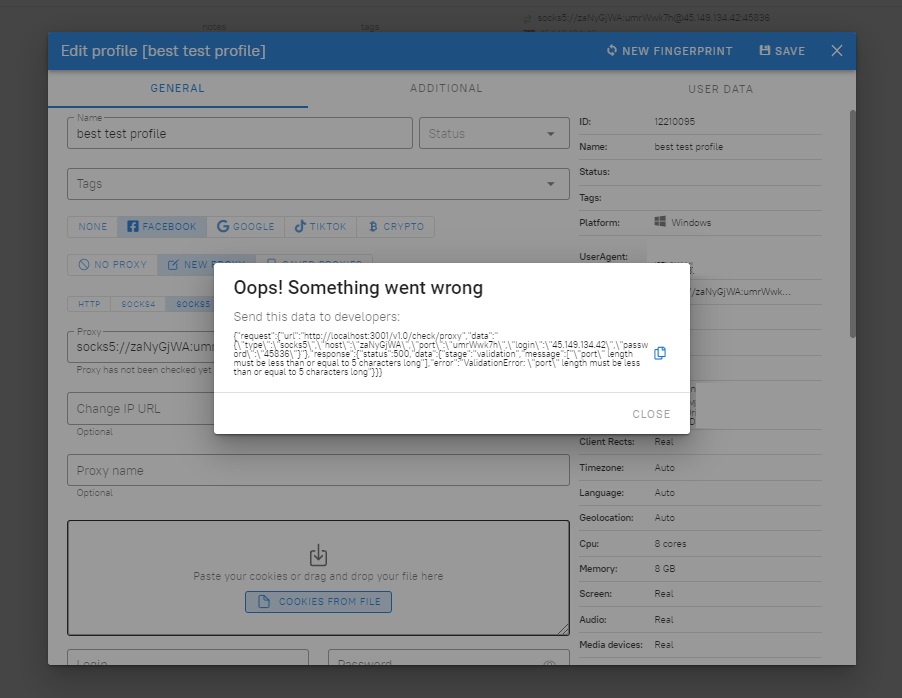
When buying a proxy, the seller can send you a file with proxies or provide them in your personal cabinet. It is important to enter proxies, as it is shown in the examples in the anti-detect browser, otherwise you will see an error:
☝️Use one proxy for only one account
Ideally, you should use one IP address for each account that is not repeated in other accounts. The exception is if you are using mobile proxies. In that case, it is enough to update IP for each account.
If you’ve bought a proxy from a trusted shop, but the account immediately drops to a check after you log in, it is better to leave the account and the proxy without action for a couple of days. After a little “rest”, it may sign in and work perfectly.
In a separate article, we’ve collected other mistakes that beginner affiliates make when working with anti-detect browsers.
What to do if there is nothing wrong with proxies and accounts 🤔
Alas, sometimes it happens that problems occur on the side of the anti-detect browser. Although these situations are rare, it may help if you:
- Participate in the anti-detect chat on Telegram. In it, users report failures, exchange information with each other and communicate with the developers of the company,
- Use Telegram bot of the anti-detect’s support service. Despite the name, users are answered by a live expert.
By the way, if you still have questions after reading this, we are always happy to answer them on Telegram.


